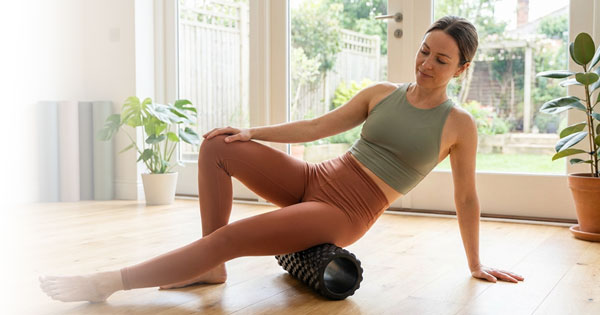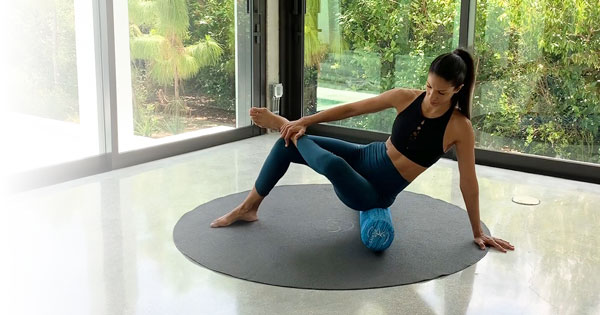
Stretching exercises with a stability ball are one of the most effective (and surprisingly enjoyable) ways to improve flexibility, release tension, and move with more ease
The moment you bring this big ball into your practice, everything changes - your range of motion expands, your body feels more supported, and your stretches become smoother and more dynamic.
The stability ball isn’t just for core workouts. It’s one of my favorite tools for deep, supported stretching. It allows you to move with your body instead of forcing it - creating a more fluid, almost meditative experience.
And the best part?
You don’t need much. Just a good-quality ball… and a few minutes to reconnect to your body.
In this guide, I’m sharing 11 of my favorite stretching exercises with a stability ball - designed to improve flexibility, support your posture, boost circulation, and simply make you feel better in your body.
Let’s roll.
Why Stretching Exercises with a Stability Ball Work So Well
Stretching on a stability ball feels different - and that’s exactly the point.
Here’s what makes it so effective:
- The ball supports your body while allowing deeper stretches
- It increases your range of motion beyond what you get on the floor
- It encourages fluid, continuous movement instead of static holding
- It gently challenges your stability and body awareness
- It creates a more relaxed, enjoyable stretching experience
If stretching sometimes feels stiff or forced - this might completely change how your body responds.
11 Stretching Exercises with a Stability Ball
Take your time with each movement and focus on your breath. The stability ball will support your body and help you move into each stretch more naturally.
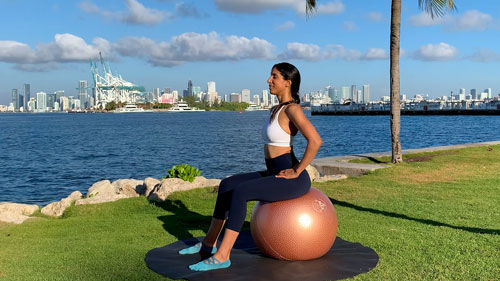
Exercise #1 – Pelvic Tilt and Circles
Why? A simple yet powerful way to release tension in the lower back and hips while improving mobility.
Movement: Sit on the ball with feet hip-width apart. Place your hands on your hips. Gently tilt your pelvis forward and back, then side to side. Gradually combine into smooth circles.
Perform 3–4 circles in each direction.
Key Points:
- Isolate the movement in your hips
- Keep the upper body relaxed and stable
- Move slowly and with control

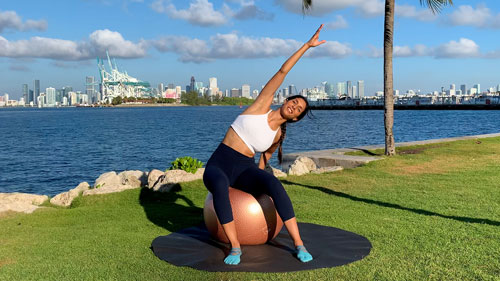
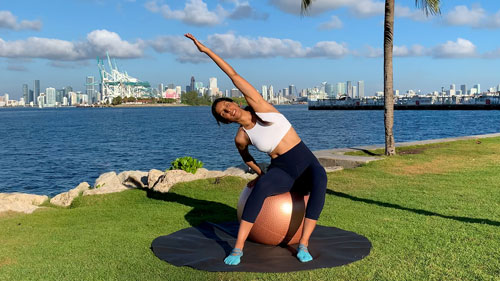
Exercise #2 – Side-to-Side Stretch
Why? A beautiful, flowing stretch that opens the sides of the body and releases the spine.
Movement: Sit on the ball with feet wide. One hand rests on the ball, the other reaches overhead. Let the ball roll side to side as you alternate stretches.
Key Points:
- Reach long through the top arm
- Let the ball guide the movement
- Widen your stance for more stability
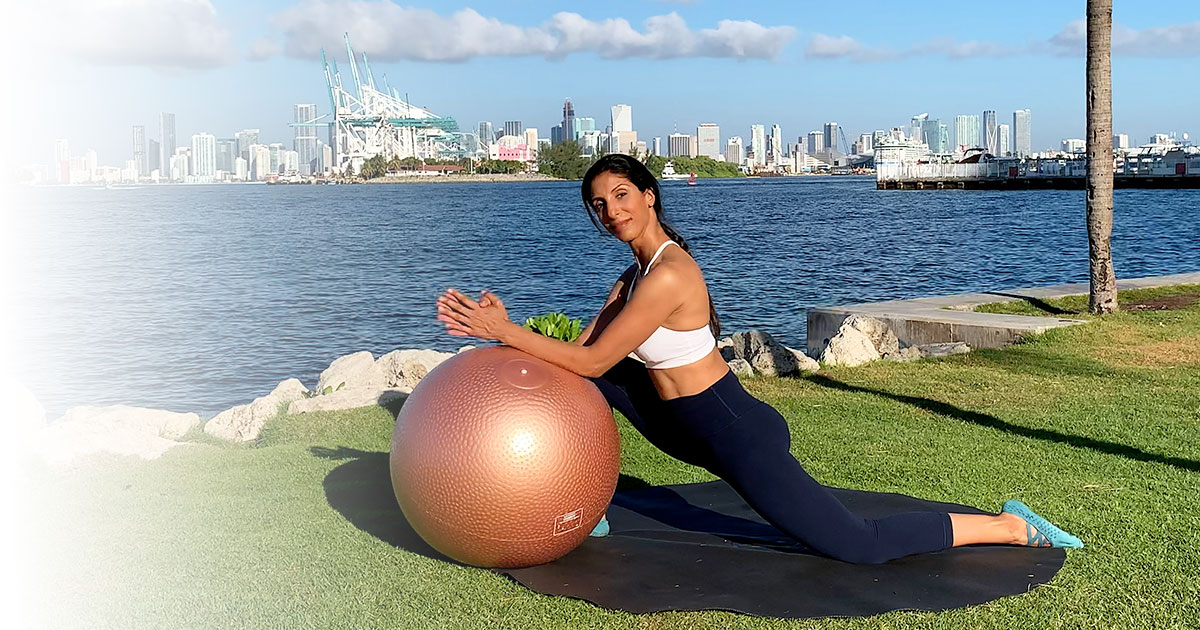
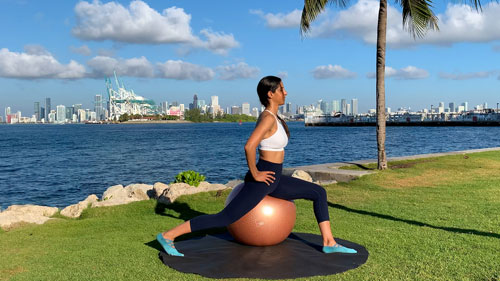
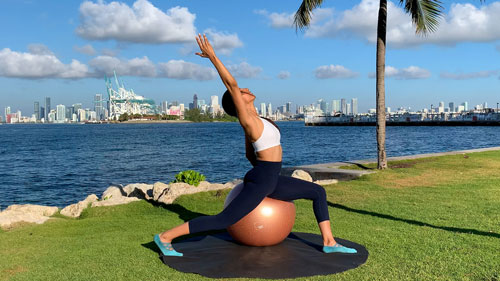
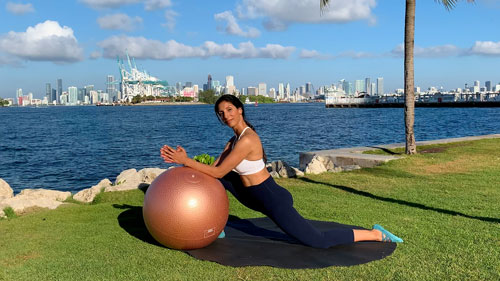
Exercise #3 – Seated Hip Flexor Stretch
Why? Perfect for releasing tight hips - especially if you sit a lot.
Movement: Sit sideways on the ball in a lunge position. Tuck your pelvis under and press through the back heel.
Progression: Reach the same-side arm up and overhead.
Key Points:
- Keep hips aligned
- Stay upright
- Avoid arching the lower back
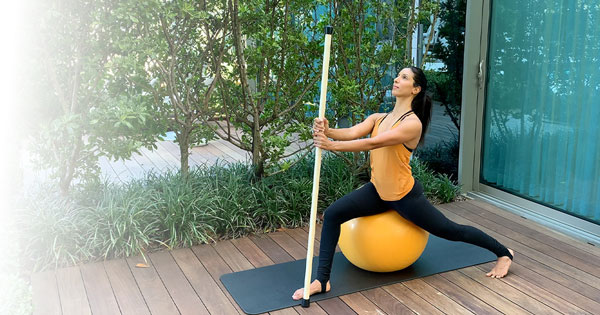
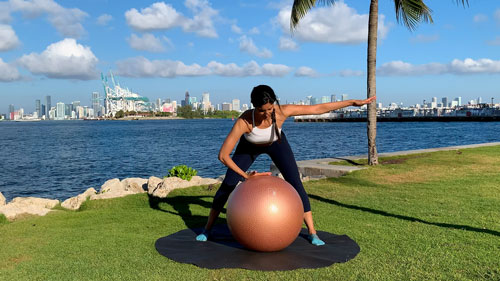
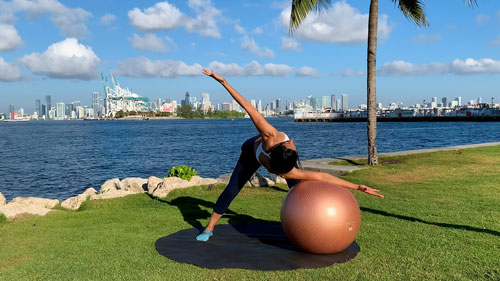
Exercise #4 – Standing Spine Rotation
Why? One of the best ways to release a tight, “stuck” back.
Movement: Stand wide, hinge forward, one hand on the ball. Rotate your torso open, reaching the opposite arm up.
Key Points:
- Start with a neutral spine
- Bend knees if needed
- Move slowly into rotation
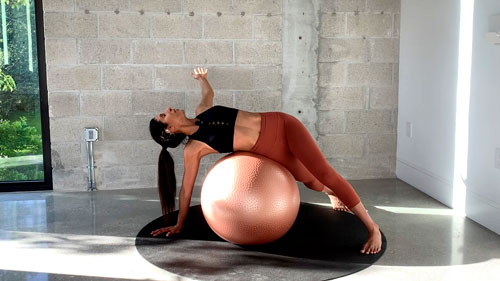
Exercise #5 – Cobra Stretch
Why? Opens the entire front body while reducing pressure on the lower back.
Movement: Lie prone over the ball, hands near hips. Lift your chest, then lower back down.
Key Points:
- Keep movement gentle
- Slightly bend knees if needed
- Breathe into the stretch
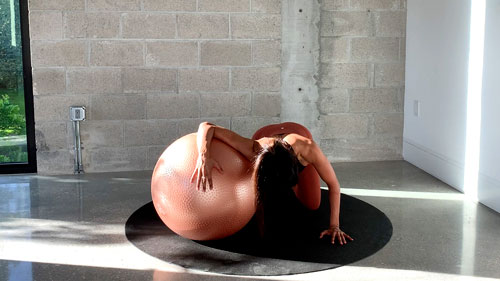
Exercise #6 – Prone Twist Stretch
Why? Deeply releases tension through the spine with gentle rotation.
Movement: Lie over the ball, hands on the floor. Rotate your torso, opening one arm upward.
Key Points:
- Inhale to open, exhale to return
- Keep movements controlled
- Modify if the ball feels too high
Exercise #7 – Kneeling Chest Stretch
Why? Great for improving posture and opening tight shoulders.
Movement: From all fours, place one arm on the ball and lower your chest.
Key Points:
- Keep chest facing down
- Hold for 10–30 seconds
- Repeat both sides
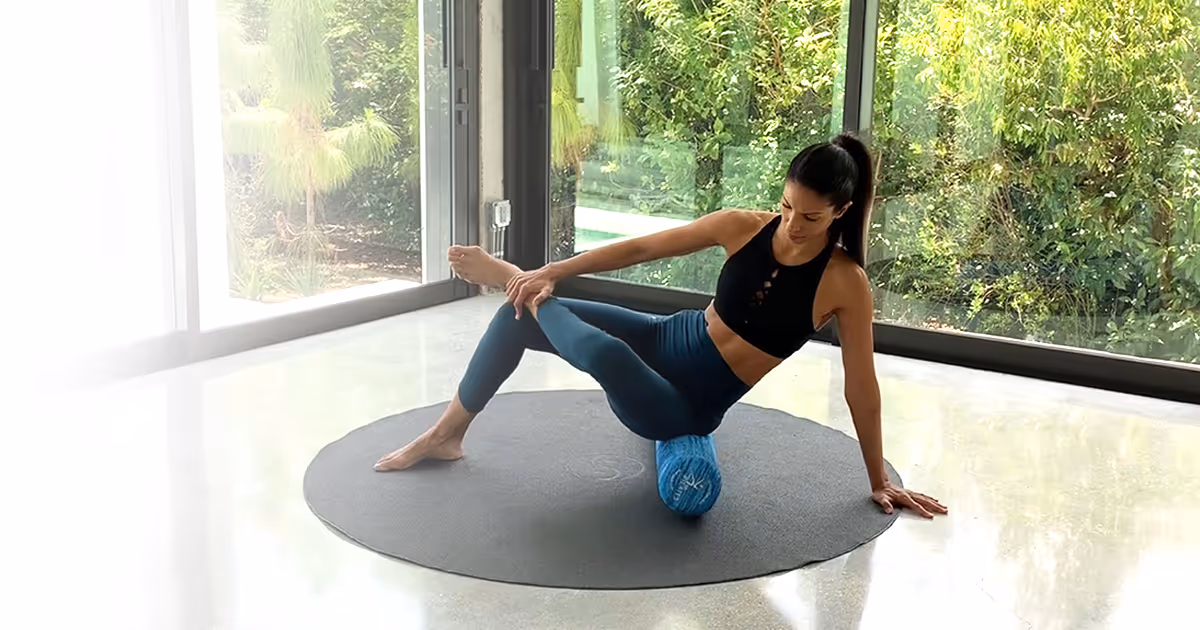
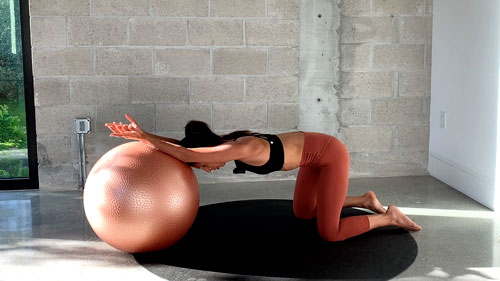
Exercise #8 – Kneeling Lat Stretch
Why? Releases tight lats and helps you stand taller.
Movement: Kneel with hands on the ball, roll forward into a long spine stretch.
Key Points:
- Keep spine neutral
- Palms facing up
- Option to rest forehead on the ball
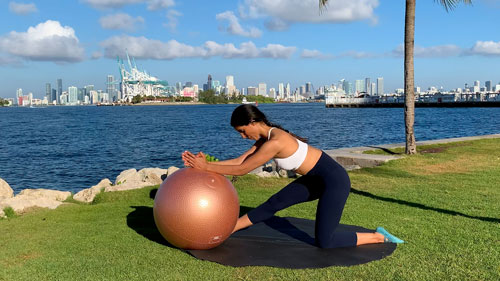
Exercise #9 – Hip Flexor to Hamstring Stretch
Why? Targets two of the tightest areas in the body - hips and hamstrings.
Movement: Use the ball for support in a lunge. Stretch the hip flexor, then shift into hamstring stretch.
Key Points:
- Stay upright
- Keep spine neutral
- Flex the foot to deepen the stretch
Exercise #10 – Kneeling Quad and Front Body Stretch
Why? A deep, full front-body opening stretch.
Movement: Kneel with the ball behind you and lean back over it.
Key Points:
- Adjust ball distance for comfort
- Tuck pelvis slightly
- Skip if too intense
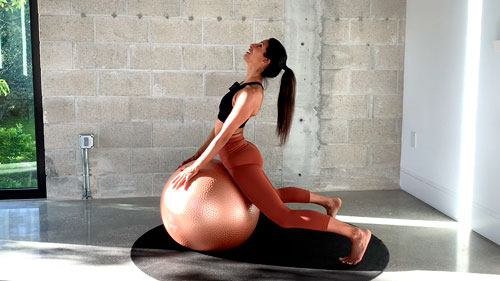
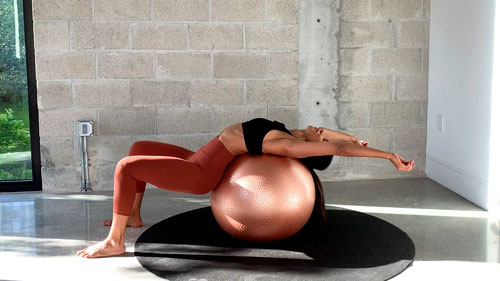
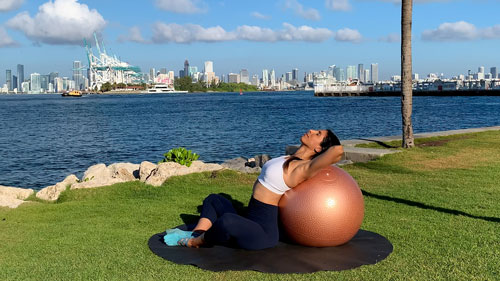
Exercise #11 – Back Extension and Abdominal Stretch
Why? A unique stretch only the stability ball can offer — opening the entire front body.
Movement: Roll back over the ball from sitting and extend your arms overhead.
Key Points:
- Breathe deeply
- Move slowly in and out
- Use hands for support when returning up
Final Thoughts: Stretching That Actually Feels Good
Stretching doesn’t have to feel forced or uncomfortable.
With a stability ball, your body gets support where it needs it - allowing you to relax into each movement, go deeper safely, and actually enjoy the process.
These stretching exercises with a stability ball are not just about flexibility - they’re about creating space in your body, improving how you move, and reconnecting to that feeling of flow.
So take your time, move gently, and let the ball guide you.
Still have questions?
If you have any questions about the workouts, guides, or anything on the site, feel free to get in touch.